Monday, April 13, 2015

4 Things to Know About Overflowing Gutters

Overflowing gutters can be a headache.  Left unchecked, they can become a nightmare. But how do we know why or how gutters overflow?  Here is what I discovered.

The number 1 reason is trash from leaves, pine straw and shingle granules. Once they stay start to accumulate in your gutter, they impede the flow of water to the downspout.  Over enough time unchecked, rain water will start pouring over the gutter.

#2  The second reason for gutter problems is small. (2"x3") builder's grade downspouts on the gutter system.system.  This is especially true when your home has upper gutters dumping onto lower roof gutters.


#3  A third reason is improperly pitched gutters.  Water will "stand" or "pond" in the gutter, away from the intended downspout if the gutter is not pitched correctly,  In heavy storms, the rain water will over flow the gutter at the low end. Proper pitching and alignment of the gutters requires using a level to ensure correct water movement in the gutter.


#4  The last reason for an overflowing gutter is inadequate amount of downspouts for the gutter system.  As today's homes incorporate more intricate designs, managing rain water becomes involved and complicated.  It is imperative to ensure proper drainage from the roof to the ground by maintaining an adequate number of 3"x4" downspouts for the gutter system.

Once these (4) items have been inspected, evaluated, repaired and modified, you can have the piece of mind knowing your gutter system is providing you the best possible protection.


Saturday, January 26, 2013

Allen and Deans recently completed a shutter project in North Raleigh.  The shutters were a raised panel, manufactured by Mid-America Building Products.  The shutters were securely anchored into the mortar joints with hidden clips.


Saturday, August 18, 2012

5V Metal Roof

We recently replaced a section of metal roofing in North Raleigh.  The recent rains this summer in the Triangle produced several leaks in an old 5V metal roof.  Due to the roof's age we determined the best approach was to replace it.

The original roof slope was comprised of a 7' and 4' section, transitioning into a lower 2/12 pitch slope.  Most of the leaks were in the transition. After removing the metal panels, we installed "ice and water shield" along the 30' horizontal transition.  Instead of replacing the metal panels the same way, we decided to use a 12' panel, folded at the transition, extending 12" into the lower panel,  providing seamless, water-tight protection for the client.

Here is a photo of the completed project.

For more information, call us at Allen and Deans.

Wednesday, July 18, 2012

Gutter Strainers

The recent rain storms in the Triangle have blown pine straw from the nearby trees into gutters a little earlier this year.  I know what you're going to say next.  "There's always pine straw in my gutters".  For many homeowners here in the Raleigh Durham area I know that is right.

In any event, I would like to discuss gutter or outlet strainers.  These are the light-bulb shaped, mesh devices placed in the mouth or throat of the gutter's outlet, just above the downspout.  They are designed to keep debris out of the outlet and ultimately, the downspout. They are readily available in all the big box stores and some hardware stores in the area for several dollars each.

Over the last 10+ years we have seen hundreds of them in gutters we have encountered.  In nearly every case the strainers work very, very well.  Except when they are neglected.

Rain water pushes the gutter debris toward the outlet, where the strainer lies, providing the gutter is pitched correctly.  The strainer prevents the trash or debris from entering the outlet, as designed. So far, so good.

However, if the strainer is not cleaned on a regular basis (which most are not), the gutter and outlet are now clogged preventing rain water from entering the outlet because debris is packed so tightly around them.  The result is water literally pouring over the top of the gutter rendering the gutter useless.

The bottom line is if you clean and maintain strainers on a regular basis, they perform very well.  If you forget about them for a season or two, you can expect problems.

Saturday, May 12, 2012

A Roof Replacement May Require Removal and Reinstallation of Gutter Protection


When considering installing a gutter guard, which is installed under a row of shingles, the inspection of the roof is a necessary component.  If the shingles are brittle or curling, or if the homeowner knows that their 15-year shingles are now 20 years old, serious consideration should be given to replacing the roof  first.  This is an important consideration to avoid a removal and re-installation of gutter guards in the near future.

Gutter covers have to be taken off before a roof is replaced. In many instances,  in order to not void the warranty, you must have the installing company do the removal and re-installation. Most companies will not be comfortable with warranting other company’s re-installation of their gutter guards.  It is not uncommon for a roofing contractor to volunteer with the best of intentions to remove and re-install the gutter protection for free.  Then when the systems fails and the homeowner calls the original installing company, they find out that the system was reinstalled improperly.  In some cases, the system was damaged and unusable due to improper removal and re-installation. We see this all too often.

There usually is a charge for this service.  The removal and subsequent installation involves the gutter installation crew to come out twice, once for the removal and again for the re-installation.  The installing company incurs set up fees twice for each service. 

Sometimes material has to be replaced.  Gutter covers don’t always go back on properly, once they are removed, especially if you are dealing with an inexperienced crew or a crew which has never worked with that type of guard.  Sometimes, the color of the roof is changed, so the color of the gutter protection is changed as well requiring all of the panels to be replaced.

There is usually a nominal fee for the removal and re-installation.  A gutter cover installer or contractor has already made a profit on the original installation and usually just covers the cost on materials and labor.  Some gutter cover installer or contractors that also do roofing will perform the service at no charge as long as you purchase your new roof from them in the future.  This is a good situation if you really need gutter protection, and your roof still has a few years of life left to it.

You can avoid an unpleasant surprise in the future if you consider the condition of your roof before purchasing a gutter protection.  You need to plan out what is going to happen when you eventually replace your roof to avoid extra expense or loss of warranty.

Saturday, May 5, 2012

Avoid Rain Water "Fly-Over" on Gutter End Caps

If a gutter is lined up to the edge of the shingles then water tends to flow over the gutter end cap.  Through the process of water surface tension, water will flow down the gutters to the fascia board, soffit and down the siding or wall of the home.  Water damage is very common in this area.

Gutters should extend beyond or past the edge of the roof line at least 1" in order to catch every drop the rain water coming down the edge of the roof instead of trickling down the side of your home's siding or wall.  More often than not, the gutters are not positioned properly at the ends of the run of gutter.  We see this problem too frequently when gutters are either installed by unqualified "contactors" or gutters are purchased in sections (10' or 15') from big box stores.

This problem needs to be taken into account when installing gutter protection (gutter guards) because the problem if unattended, will become much worse.  Here are some solutions:
  • Position the new gutter(s) to extend beyond the roof line, if the gutters are being replaced.
  • You can have the gutter(s) extended by adding an outside mitred corner that will wrap around the edge of the roof line and is more likely to catch the dripping from the sides of the roof edge.
  • The edge of the first row of shingles can be shimmed slightly to direct the flow of water away for the edge and into the gutter(s)
  • A diverter can be installed on the roof to direct the flow of water back into the gutter(s)
You can perform a simple inspection from the ground to see if you have this problem on your home.  Look (perhaps with binoculars) at the ends of both your roof line and the gutter end cap.  If the roof line extends beyond or past the gutter end cap, the gutter is short.  If in doubt, call a gutter professional to evaluate.  Most will do this at no charge.

Saturday, April 28, 2012

Chimney Chase Covers

As some homes near their 20th year of service, not only are the roofs are losing their serviceability so are
the chimney chase covers.These are the metal covers that are placed on top of the chimney.  They are designed to keep water from entering the chimney and fireplace. They are usually metal, mostly steel.

As you can imagine, with steel comes oxidation and rust.  Many times the rust is so pervasive, it leaves
severe rust stains on the siding of the chimney.

Here is a photo of a nearly completed chase cover we recently installed here in Raleigh.  The cap still has to be reinstalled above the flue.

If you look carefully, you will see the top is "partitioned" or bent in order to prevent water from "standing or ponding" on the top.  Also, we provide a  3/8" "kick-out" on the vertical edges to prevent water from falling directly on the siding below.

This chase cover will provide another 20 years of uninterrupted service.

Friday, March 16, 2012

Gutter and Gutter Protection Project

Earlier this month, we had the opportunity to work with a local company installing new gutters and gutter protection here in Raleigh.  Here are a couple of photos from that project.
The job featured 5" seamless aluminum gutters and large 3"x4" aluminum downspouts. As you can see, the front and side lengths are long, in excess of 40' and 30' respectively.  The color is Dark Bronze.  We finished the project with a "hooded" gutter protection in the same color.

As you can see, the front and side lengths are long, in excess of 40' and 30' respectively.

Friday, February 17, 2012

Roofing Tip

Here is a tip from Danny Lipford, a nationally syndicated TV show host of Today's Homeowner with Danny Lipford.

What could that wet spot on my ceiling mean?

The dreaded water stain on the ceiling is a sure sign of a leak that needs to be fixed right away, before it does any more damage. A little detective work in the attic or room above the leak should, in most instances, reveal what's causing it.

Roof leaks can be difficult to find, because water often runs down the roof decking or rafters before it reached the ceiling. Common culprits include damaged shingles, nail pops, gaps around flashing on chimneys, dormers, valleys or cracked vent pipe boots. Damaged shingles should be replace and suspicious spots sealed with roofing cement.

Friday, January 6, 2012

Here come the squirrels again!

Last March, we had the opportunity to replace a roof for a client in Bahama, NC.  The project went very smoothly...that is until last week.

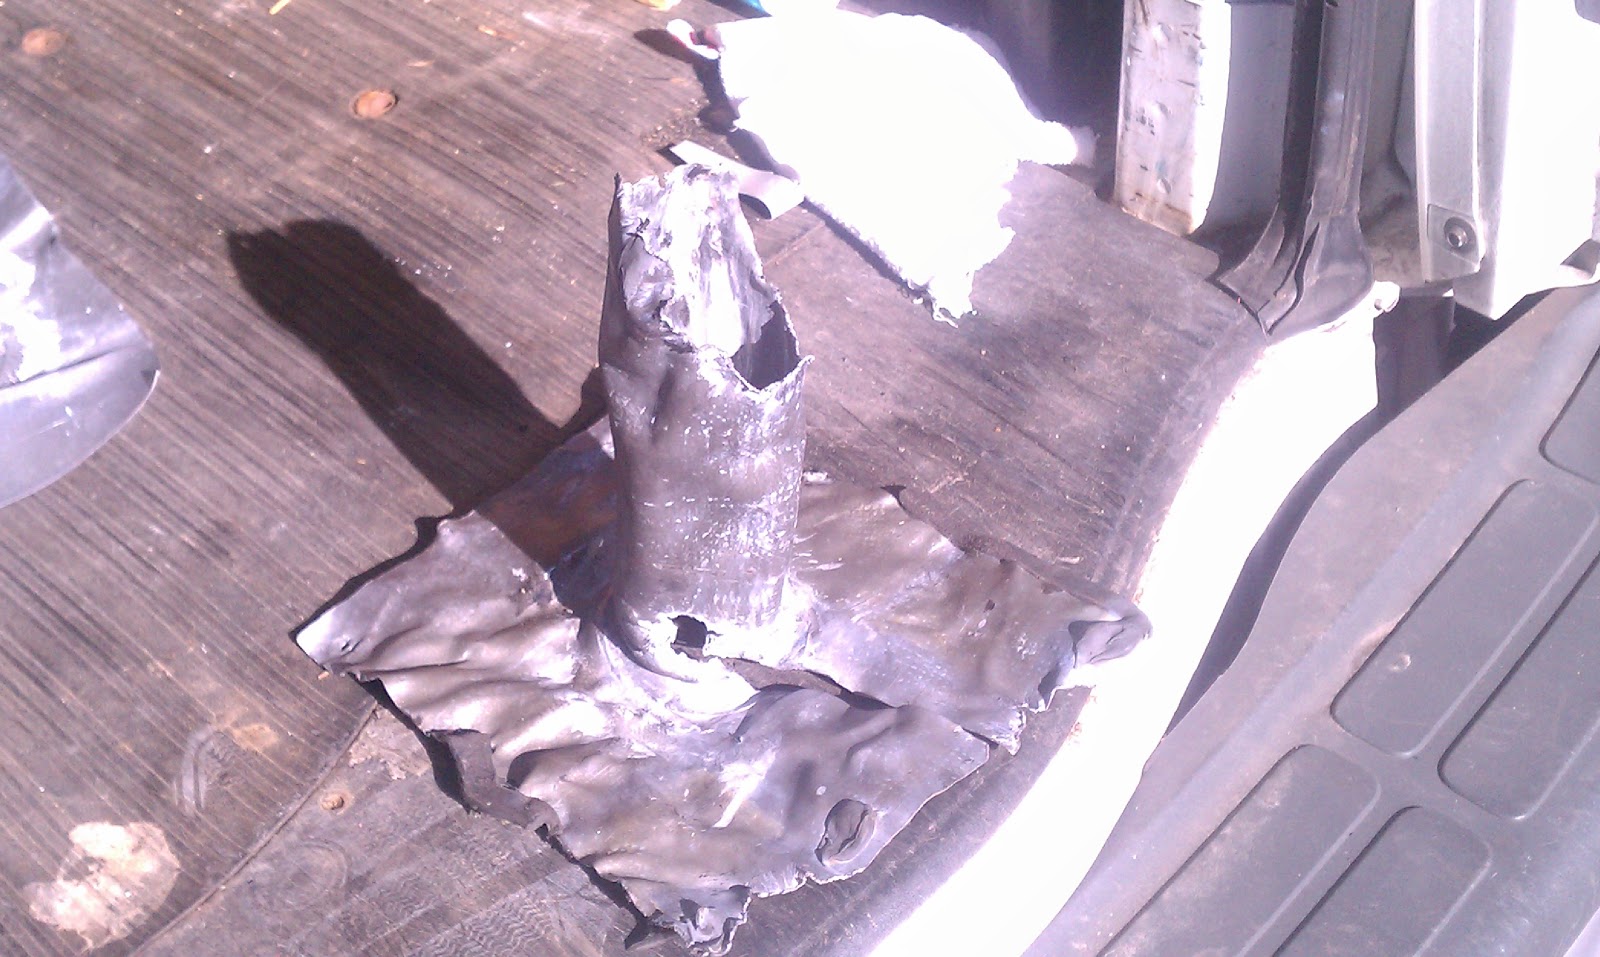
We received a call from the client reporting squirrels were knawling on his recently installed pipe collars.  These were not the usual black neoprene pipe boots. We had installed lead pipe boots which under "normal" circumstances last longer than neoprene.

Much like my earlier post, dated 7/6/11, the squirrels had other ideas.  Here is what we encountered when we retrieved the collar.  Again this is the second time this year we have encountered squirrels damaging metal.

 Anyone with a suggestion as to how to prevent this type of damage in the future would be greatly appreciated.

Sunday, December 18, 2011

Thank You for all of your Support

As we wind down the last couple of weeks of 2011, I wanted to express my appreciation for all of the support we have received this year.  It has been a very busy year.  Hundreds of Triangle residents and building owners trusted us to repair or replace their roofs and gutters.  We have exceeded nearly all of our expectations in 2011.

With that being said, what I feel is more important is whether we exceeded your expectations. I never want to lose sight of that goal.  I believe it is fundamental to our existence.

We at Allen and Deans want to thank all of you who have either considered us or actually contracted us.  We do not take that consideration or trust lightly.

Wishing all of Raleigh only the best this Holiday season.

Thursday, November 24, 2011

Thanksgiving Blessings 2011


We hope everyone is enjoying Thanksgiving with their families and friends.  We at Allen and Deans are very thankful, as 2011 has been a very good year.

But much more importantly, I would also like to express my thanks, appreciation and gratitude for the men and women in our Armed Forces, past and present, who will not have the opportunity to share this Thanksgiving with their families and friends.  Because of their sacrifices, I have the opportunity to do what I do and live in the best country on the planet, in FREEDOM.

May God Bless and protect you all.

Saturday, November 5, 2011

Chimney Cricket not Jiminy Cricket Installation

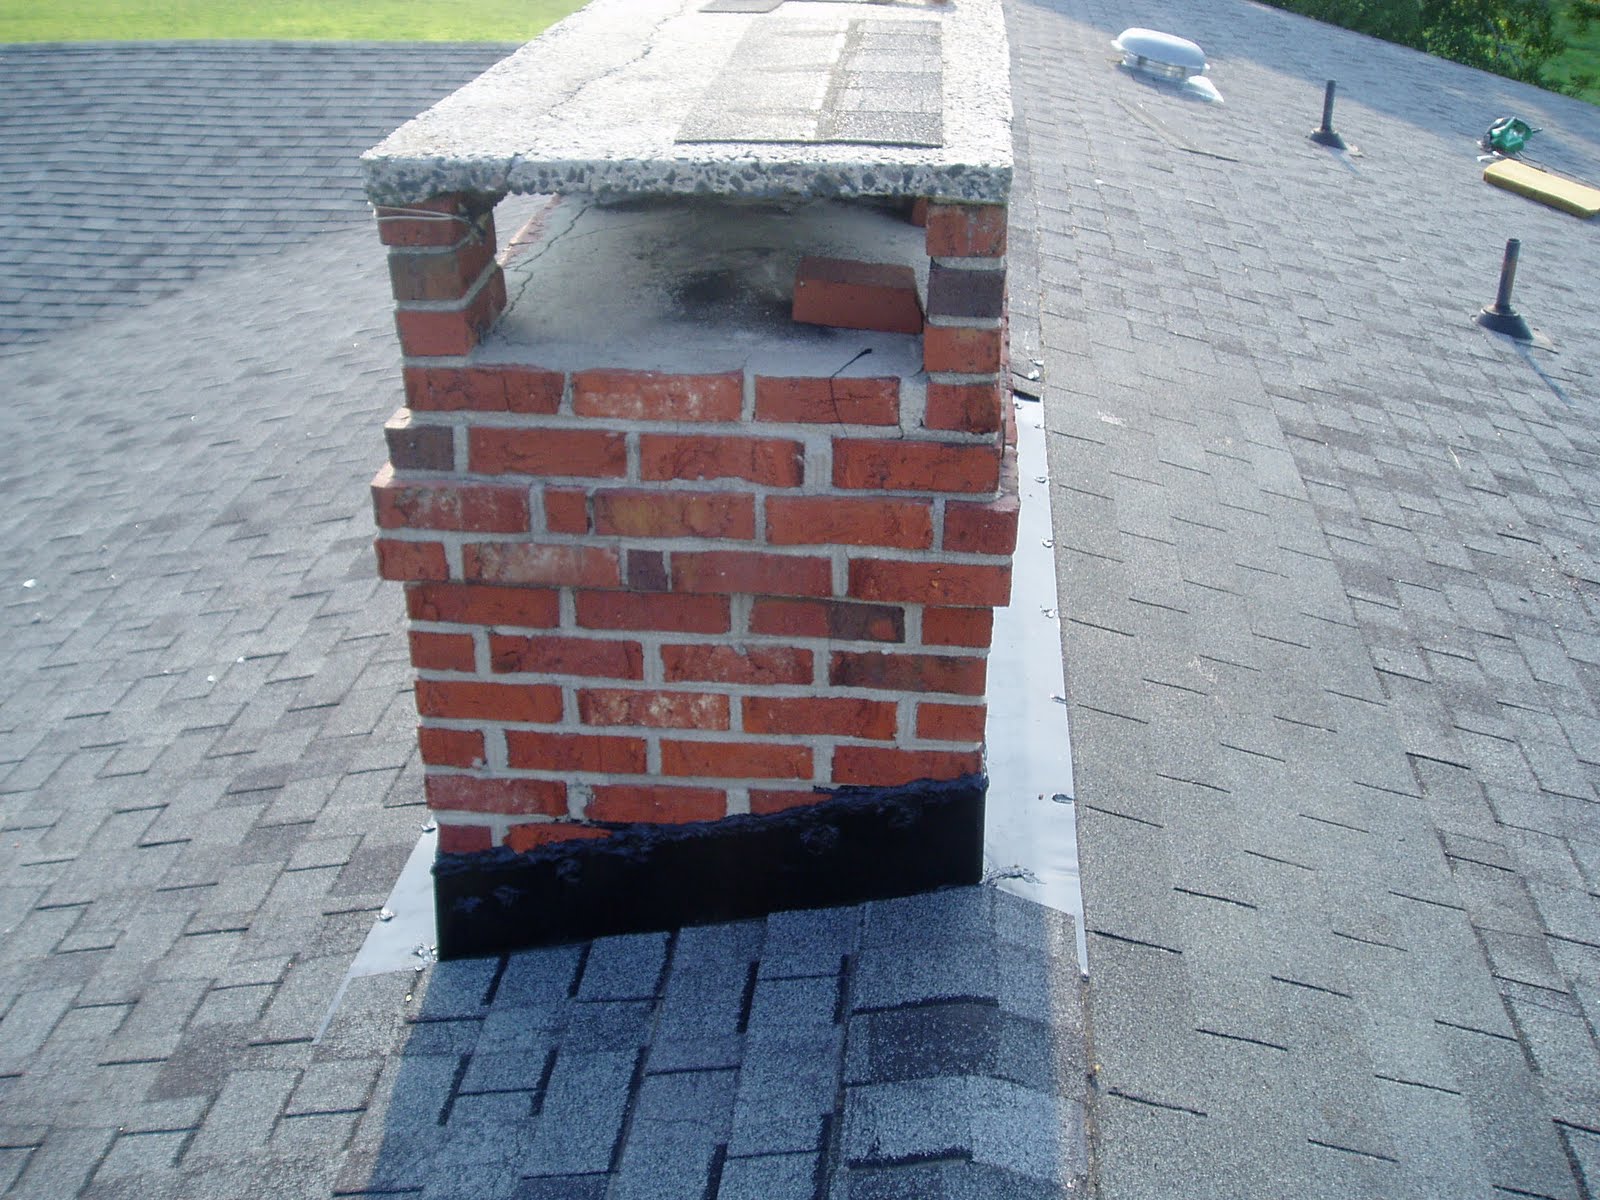
There are time when we receive calls at Allen and Deans about leaking chimneys.  In most instances the metal flashing has rusted or corroded allowing water to enter.  However, there are times when the chimney is positioned at the eave (bottom of the roof) and there is no cricket.  Rain water flowing down the roof hits the back of the chimney.  Over a long period of time, water will begin to infiltrate or penetrate in or around the metal flashing, which is the last line of defense for the chimney.  This is usually the case in older homes here in Raleigh.

Here is a photo of a brick chimney we worked on recently. Note how wide the chimney is.  It almost serves as a dam for water as the water runs directly into the back wall.


Add some pine straw or leaves behind the chimney and you can easily see how water and moisture can stay behind the chimney and not flow away to the sides and off the roof.

A cricket is nothing more than a wooden structure consisting of 2"x4" lumber for the base structure and 7/16" OSB for the angled platform.


The last photo is the cricket completed with "ice and water shield", new metal step and counter flashing and new, 3-tab, self-sealing shingles.
Now when it rains, the water is safely directed to either the right side or the left of the chimney falling harmlessly into the gutters below.


Roof Damage from Storm

From time to time, we encounter roof repairs in Raleigh from storms.  In this case, we were asked to repair a pavillion or shelter roof damaged from the tornado earlier this year.  Here you can see what we were faced with.  As you can see there was damage to the decking (sheathing), fascia board on both the eaves and rakes, trim, drip edge and the shingles.


Here is a picture of the roof repair upon completion. It features a GAF Royal Sovereign, Autumn Brown shingle.

Sunday, October 30, 2011

Bradford Creek Golf Course

We recently had the opportunity to work with The Parks and Recreation Department of The City of Greenville..  The clubhouse roof at Bradford Creek Golf Course was severely damaged as a result of Hurricane Irene, earlier this summer.

The project featured a CertainTeed LandMark 30 architectural shingle.

Here is a photo prior to the start of the project.


Here are some photos after the roof was installed.

Wednesday, October 5, 2011

Roof Deck (Sheathing) Overlays

Due to the tornado we experienced in Raleigh earlier this year, Allen and Deans has had the opportunity to repair or replace many older roofs. In several cases, the roofs on these homes were over 40 years old.

When inspecting and measuring these roofs I could not help but notice numerous "soft" spots, especially between the rafters. In some extreme instances, you could hear the plywood sheathing starting to crack from the weight of my step.

Upon further inspection we discovered the following:
1) The plywood sheathing was only 3/8" thick instead of 1/2"
2) The rafters were 24" OC instead of 16" OC
3) There was no roof-top ventilation only gable-end vents

It has been demonstrated due to excessive heat build-up in the attic, combined with thin plywood sheathing and 24" OC rafters and time, plywood begins to show signs of stress and fatigue.

We discussed options with our client. It was decided to install a 7/16" OSB (Orient Strand Board) directly over the existing sheathing.


By directly nailing over the existing sheathing, there was no cost for labor to remove the original sheathing, nor was there any additional dump or landfill fees.

The roof structure is very secure and solid. It is now ready to accept new shingles in order to successfully complete the roof project.


Saturday, August 27, 2011

Here is a post about our recent solar power roof ventilator (fan) installation. www.raleighroofcontractor.blogspot.com

(Almost) Free Roof Ventilation

Over the last 36 months, we have received a number of requests for roof ventilation. But these requests are not inquiring about ridge vent or even electric (power) roof ventilators. Clients now are inquiring about solar powered roof ventilators.

Earlier this week we had the opportunity to install a new Green Machine(tm)Solar Powered Vent by Master Flow for one of our clients.

We started by finding the center of the roof. We then removed the shingles and felt in the designated area. We took the plunge by cutting in the roof according to the unit's size as you can see below.


We then set the unit in place and proceeded to flash around the unit's base with new "ice and water shield" and new shingles. Upon completion, the installation looks like this.


So far clients have reported a noticeable reduction in their energy consumption costs as a result of the installation. Also, unlike an electric power ventilator, which will run for hours on end, using electricity in the process, this unit is passive.

Monday, July 18, 2011

http://ping.fm/nRllP

Chimney Flashing Repair

We recently received a request to repair a leaking chimney. We could have simply caulked the perimeter of the counter flashing and "called it a day". However, it has been my experience that caulking a chimney does not provide a long term solution. In many cases, it does not provide ANY solution at all.

We took a much different approach to solving the flashing leak. We removed all the shingles, felt and metal flashing. Upon cleaning the perimeter very thoroughly,
we installed a weather barrier or generically referred to as "ice and water shield" around the perimeter as you can see below.


You can see how we installed the "ice and water" on the wall and then folded it so it laid flat on the roof deck on all 4 sides of the chimney.

We then installed new step flashing, which is covered up by the new, black counter (outside) flashing.


Once the counter flashing has been caulked, we then finished the repair by installing shingles along all 4 sides of the chimney.

This flashing process will provide problem and leak free service for many years to come.

But wait a minute. Something doesn't look right here. Can you tell what is wrong in the last couple of photos? Look carefully. Do you see it?

You are right. It is the shingles. They don't match, do they? The shingles on the back slope are regular 3-tab shingles. The front shingles are a CertainTeed Horizon shingle, which unfortunately were discontinued a couple of years ago. In order to make the front slope of the roof (look) presentable, we kept and in some instances "reused" the Horizon shingles from the back roof slope whenever possible. We simply installed the new shingles on the back slope where they would not be as noticeable or visible.